
So, we've all been there, spending countless hours mindlessly typing up references for that long essay we've just written. The whole process is a bore, finding the references, formatting them correctly and then inserting all the in-test citations. Hopefully by now we have all discovered Endnote, and that the university provides it to us for free! In this series we'll be looking at how to use Endnote to its maximum. Some of this information you may already know, especially the basics covered in today's article, so you're welcome to skim it and skip it. But if you're an absolute novice, or even *gasp* haven't heard of Endnote, carry on reading and we'll bring you up to speed. 🙂
Sincere thanks go to Ranesh Palan who inspired this series, and to Simon Mahoney whose efforts make up much of this series.
-Kiran Narula
- EndNote P t1: Getting to know the basics
- EndNote Pt 2: Downloading citations directly from Google Scholar and importing into EndNote
- EndNote Pt 3: Using Google Scholar for article searching then letting EndNote do all the work
- EndNote Pt 4: Importing references from the PubMed website
- EndNote Pt 5: Importing references from the PubMed via Endnote
So what is Endnote? Endnote is some brilliant software designed to help you manage your bibliography/references section of that 1000+ word essay you're writing. It can take care of all that nitty-gritty formatting and when we show you, it can even help you find references!
Where do I get this Endnote you speak of? Endnote is freely available to use from the UWA Library Website. Click on that link if you don't already have a copy and download it. It is for both PCs and Mac.
Okay, I have it, now what? If you haven't already - install it! Double click the download and follow the prompts. If you have Microsoft Word, there will be an option to install a toolbar - make sure you do.
The next step is to prepare it for use at UWA.
Firstly, you will want to download the UWA Vancouver Formatting styles from the library website. "Styles" are a file that dictates how the references will be formatted by Endnote. There is a default Vancouver style, but at UWA you really ought to be using the UWA designed Vancouver style. This can be downloaded from here. To install and enable the style follow the Library's instructions available here.
Secondly, we will want to install the abbreviated Medical Journal List. This can be downloaded from here, and again the library provides instructions on how to install that. Our library is pretty great isn't it.
I'm all ready to get started! Excellent, Endnote is now ready for use.
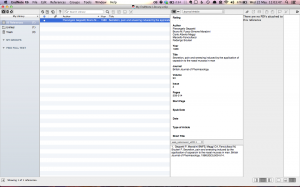
Firstly let's create a reference. As seen in the screen shot, Hit control + N or command + N on a mac to create a new reference.


Next, enter in the details. You can change the type of citation by clicking on the box. There are lots of fields to enter information into. If you're unsure of what should go where, consult the University's guide. We will now have our citation sitting in our Endnote library.
To insert it into your essay, switch over to Word. Then click on the insert reference button. Presto, there will be a nice in-text reference along with a pre-generated bibliography. You can see in my bibliography my 'recent' article is from 1988! You can continue to insert references at your leisure, and Endnote will even re-order the numbering for you if need be.


So that's the basics. In the future parts of the series we will look at how to do even more with Endnote, i.e. things that will make our life even easier!
Where can I get more information? More info is available from the Guides section of the UWA Library website. In addition, the Library regularly operates tutorial sessions on how to use.
What are my alternatives to Endnote? If you don't like Endnote, worry not there are some alternative programs. These include RefMan, Papers2 (Mac only), Refworks, Zotero, Mendeley, BibMe. I'll have to let you explore those by yourself.